


I will rate this a 7 out of 10.
Mr SuperChicken rates it 8 out of 10 (but every time he has a piece he wants to rethink the score and maybe give it a 9.5)
Mmmmmm..... doesn't that look amazing! Ok- so I could have remembered that my cookie sheet and stove is not the best backdrop, but with that Pie in the photo who is looking at the stove!?
I will be posting step by step photos- and the full recipe will be at the end of the post for easy printing (highlight the text- right click, hit print, and choose "selection" in the print menu for those of you who need to know)
Ok, this pie has what I call 3 sections. I will call them "Prep", "Bake", and "Finishing". I will not get exact with the measurement of the ingredients, but they will be listed at the end of the post. (in Future post I will not post this info- but since this is the first post I will put it all out there)
I First found this Recipe on Pioneer Womans cooking blog- but I have changed around the recipe some, and I really like this version better. It was more "apple pie" like, and less apple crip like. It was a big hit with Mr. SuperChicken (not my husband- but hopefully soon) He is usually a willing guinea pig, and he is rewarded at times when I hit a home run like this pie.
Ok- First step- Take your store bought deep dish pie crust out of the oven. No gasping- they are really good things! They save time, and are really reasonably priced (2 pie crusts and tin for 1.99! Plus no clean up after the ordeal of making a crust)
Follow the instructions on the package for a EMPTY pie crust. (usually oven is 400 for 10 to 14 minutes) the key here is not to cook the crust fully- just about 80%. It will finish later. Trust me- this matters. (Raw crust is a nasty crust!)
Now, while your crust is baking, you want to peal, core and slice your apples. *FEN* (*From experience note*) Here is the catch with the Apples- do not use all of the same kind of apple. Choose 2 or 3 different kinds- it gives a wonderful depth of flavor that 1 kind of apple cannot.
I used 2 Gala, 2 Golden Delicious, and 1 Granny Smith. *FEN* If you choose to ignore my first note- then please do NOT use all Granny Smith Apples. I tried this once, it did NOT taste right. It was very bitter and tangy- not good in a pie. Save the Granny's for caramel apples- but use no more than 1 in this pie.

Slice the apples into long and thin slices. We want them to overlap each other like layers of the earth, not create mountain scapes with boulders of apple.
Next add the Lemon juice, Sugar, Salt and Flour. And because I can never follow directions, I always add "extras" to a recipe. Call it a quirk- but I skipped this the first time and I was sorry enough that I will not do that again. So I sprinkle in some cinnamon (not too much- just a few dashes) and add about a tablespoon of vanilla extract. Fruit should always get a dash of vanilla- it brings out the rich flavor of the fruit- and because I LOVE vanilla :)

Stir the mixture and let sit for a few minutes to meld flavors together.

Stir the mixture and let sit for a few minutes to meld flavors together.
By now the pie crust should be coming out of the oven. Note that it is still raw in some places- this is ok- we do not want to over bake it. Also- ignore any cracks- it really doesn't matter and no one will ever see them :)


Now prepare your "topping" for the pie. *FEN* make sure you have room-soft butter on hand for this. I can never remember and have to use the microwave to soften my butter- and it always melts too much and I get runny butter- do not be like me. This will not kill the recipe, but instead of a light crumbly crust, you will have more of a stiff crust. It will still taste amazing, but if you have issues with texture make sure you have soft butter on hand.

(Don't do this!)
Make sure your oven is now set to 375 Degrees.
Ok- In a bowl- Mix your brown sugar, oats, flour, salt and butter. Use you Pastry Cutter (if you do not have one- use forks- but this $3 tool is a life saver. Cut the butter and dry ingredients together. (if the butter was soft- it will more of a crumble- if the butter is melted it will be more of a paste that breaks apart).

Set the Topping aside, and move back to the crust and apple mixture. Now your apples will be coated in a nice tasty syrup. Here is where it is time to get your hands dirty- take a handful of your apples and give them a squeeze and shake and get some of the juice off.
We want to have SOME moist mixture on the apples, but you do NOT want dripping WET apples going into your nice crust. If you skip this step you will have a runny wet pie and a mushy crust. Not very tasty.
Repeat the apple step and fill your pie crust. You may need to "GENTLY squish" some of the apples into the crust corners. It may crack the crust a little, but it will be ok. You want the surface of the pie to just come over the lip of the pan. The Apples will settle after cooking, but you do not want a large piled pile- it will be very hard to place to topping on top if you do.

This is just right- nice and level, and full of goodness.
If you do not use up all your apple- that is OK. There is a fix for that :)

See all the Juice? That is what would have ruined your nice crust. See all those leftover apple pieces? wondering what you will do with them?
Well Hello there! It's my favorite 1 cup ramekin :)

See all the Juice? That is what would have ruined your nice crust. See all those leftover apple pieces? wondering what you will do with them?
Well Hello there! It's my favorite 1 cup ramekin :)

Fill your ramekin with the left over apples (since there is no crust- you do not have to shake off the excess liquid- wet apples will be just fine here) After all- you are working hard- you deserve your own private snack :)


(Looking good rami!)
Now take the Oat Crumble and start topping the pie. You want little chunks (about the size of a large grape) and start covering the pie. You do not want to cram this on- just cover it and make sure it will not roll off. Cover all the apple you see- and then start stacking up- but try to keep the layers even. Make sure that save some of the topping for your own little snack cup
Then cover the edges of your pie with foil so that the toasty crust will not burn.


~Now comes Section 2 "Bake"
Place in the oven along with you own snack.
*FEN* Make SURE that you place something UNDER the pie. This will most likely bubble and hiss over the edge- not much- but enough to drive you nuts as you are scrubbing the oven later in the day. Take a moment and place a cookie sheet\foil\pan under the pies.


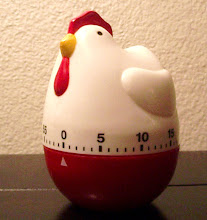
Set your timer for 45 Minutes. If you are lucky you will have a adorable Chicken Timer, but if you don't and you need to use your oven timer- I won't tell anyone- it will be our secret.
Now take a good handful of Pecans. I know, I know- that is not a accurate number- but this is how much I used. Chop them nice and fine. (you should have about a 1/2 cup when you are done)
No large chunks of pecans please- no one wants chipped teeth :) If you happen to be allergic to nuts- you can skip this step. It will not taste AS amazing- but pretty darn close.

(A healthy-sized handful of Pecans)

(A healthy-sized handful of Pecans)
When your timer goes off- open the oven and remove the Foil from the edges, and sprinkle the nuts over the top of the pie. Return the pie to the over for another 6 to 10 minutes. You only want to toast the nuts- not burn them. Remove the pie before they get to dark (the oil in the nuts will continue to cook them for a few minutes.
When they are ready (no more than 10 minutes please) remove the pie to a cookie rack.

Now comes the BEST Part- Section 3- "Finishing".
Take your jar of Room-Temp Caramel (If it is cold- it will be harder- but heck! nuke it- it won't hurt it) and Pour or "Spoon" Half the bottle of caramel over the Pie. Trust me- half a bottle seems like a lot- but it is a large pie and the more the better. (If you use the whole bottle, I won't tell- I would have but i needed the 2nd half for another pie!)
Any Caramel topping will do. You can make your own caramel if you like- but I am all for easy (and heck this brand was on sale!) and tasted great.

When you pour it over the pie- it will puddle and look really runny. No worries about that. As the pie cools down it will soak into the crust and create a amazing topping.

Now, you can serve this whipped cream or some vanilla ice cream, but really this pie is rich enough to satisfy without any other topping. You can Serve while warm- but I would not serve it while hot- The apples will not hold up and the crust may crumble- but hey-whatever floats your boat :)
I hope that you give this a try- and if you like it- or have something that you changed and liked it better that way- leave a comment :)
Happy Eats!
Caramel Apple Pie
1 frozen Pie Crust
Filling
4 or 5 Med to Large Apples
Juice of 1/2 a Lemon
1/2 cup of White Sugar
4 Tablespoons Flour
1/4 Teaspoon Salt
Topping
1/2 Cup Flour
1 1/2 Sticks Butter
1 Cup Brown Sugar
1/2 Cup Oats (I like "Quick" oats because they are smaller and crumble better)
1/4 Teaspoon Salt
Finishing
1/2 Cup of Chopped Pecans (fine)
1/2 Jar (or more) of Caramel topping (bought or made)
Follow the Package instructions about how to prepare a EMPTY pie crust. But only cook crust to about 80% done. (as we will be baking it later as well)
Mix peeled, cored & sliced Apples, lemon juice, Sugar, Flour and 1/4 teaspoon Salt together. Set aside.
Cut the soft butter into the flour, brown sugar, oats, and 1/4 teaspoon salt. If you want to be a rebel- add some cinnamon (few shakes) and some vanilla extract (about a tablespoon).
Add apples to prepared pie shell and top with crumb topping. (Do not over fill- make it level and full- but not heaping) Make yourself a mini pie with leftover apples if you like in a ramekin.
Cover the edges of the pie with foil and bake in a 375-degree oven for 40 minutes. Remove foil from crust and Sprinkle 1/2 cup of chopped pecans on top place back into the oven for another 10 minutes. (or when the nuts get golden- sometimes it is only 5 minutes)
Take the pie from the oven and pour 1/2 jar (or more, if you like) of any caramel topping over the top. Wait for pie to absorb the caramel rivers and cool a bit. Enjoy while warm.
Will stay fresh on counter for 2 or 3 days if well covered. If in the fridge (which I am not as fond of) it will last about a week- but I doubt it will last that long.
Enjoy!
1 comment:
Hey Lauren,
I want to be a guinea pig for that pie too. I too, have a chicken
timer, thanks to you. Plus,I can't help but notice that drip pan, hummm....
Good job on this site, I enjoy it.
Post a Comment